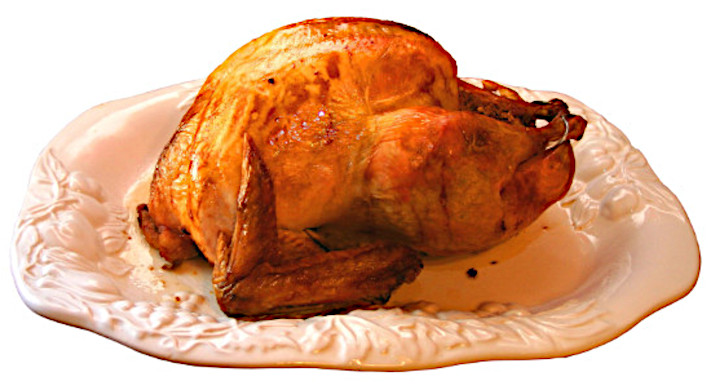
Salt + Heat = A Fantastic Roasted Turkey (without all the work). Imagine the hardest part of making your turkey for Thanksgiving being lifting the thing out of the oven? Dry-brining can make that the case! Instead of a liquid bath/brine, learn how salting your turkey several days before you roast it will give you an amazingly moist and tender bird. Because this is a technique that requires you to start your prep (not counting thawing if you are using a frozen bird), we're not saving our Thanksgiving Turkey post until the end of our Turkey Day posting extravaganza. This way, you've got enough time to get everything in order and make Thanksgiving delicious and laid back!

A few things to know about dry-brining:
- The bigger the piece of meat you are brining, the more salt and longer time will be needed to accomplish that perfect result. Plan ahead!
- Because dry-brining doesn't add liquid to your bird (it makes it retain it better during the roasting process), you may wish to increase the amount of liquid you add to your roasting pan to make sure you have enough to make lots and lots of gravy!
- Do not rinse your turkey! Rinsing raw poultry just spreads harmful germs and juices around your kitchen and increases the chance of illness. You might be worried that all that salt will leave your bird too salty, but trust me when I say that the salt residue has left the skin of the bird by the time it sees your oven. Besides, rinsing it after salting will make the amazingly crispy skin that results from this technique go away.
If you are a purist like me, instead of using the plastic bag method described below, you will give your turkey a shelf of its own and leave it uncovered while dry-brining. When done this way, the skin is absolutely perfect, in my opinion. Of course, using a plastic bag or plastic wrap to cover the bird is also fine (and probably recommended if you have youngsters in your home).
While the basic instructions below are for a roasted bird, dry-brining works with grilling or deep frying a turkey as well. Just follow the brining instructions and then carry on with your other cooking method. Likewise, the herbs and aromatics I used in this version can be tweaked to suit what you have on hand. Oranges, shallots, and sage make for a very festive flavor combination as well. You can even choose your wine and/or broth to suit your preferences. However you make it, dry-brining will give you the perfect combination of crisp skin and tender, juicy meat for your entertaining needs!
Basic Dry-Brined Turkey
- 1 (15-20-pound) turkey
- Kosher salt
- 1 tablespoon black pepper, divided
- 1 bunch fresh thyme
- ½ bunch parsley
- 2 small onions, halved
- 2 small apples, cored and halved
- ½ cup solid fat, softened (butter, bacon fat, and even coconut oil will work)
- 2 cups white wine or broth, divided
Two to three days before roasting, rub your turkey all over with kosher salt, slipping the salt under the skin where possible and rubbing some into the cavities. Use about 1 tablespoon per 4 pounds of bird.
Wrap the turkey in a large plastic bag and place it in the refrigerator. On the second night, turn the turkey over. A couple of hours before it's time to roast, remove the turkey from the bag and pat it dry. Do not rinse it first. Place the bird in a roasting pan.
Preheat the oven to 450°F. Sprinkle half of the pepper into the main cavity of the turkey; add the thyme, parsley, half the onions, and half the apples. Put the remaining apples and onions in the neck opening and tuck the neck skin under the bird.
Rub the solid fat of your choice under the breast skin and onto the thigh meat. Sprinkle the bird with the remaining pepper. Flip the bird carefully in the pan (I adore using a roasting rack for this) so that the breast side of the turkey is facing down. Tuck the legs under, using the rack to hold them in place. Truss them only if they are not held in place.
Roast the turkey in the preheated oven for 30 minutes. Reduce the heat to 350° F and add 1 ½ cups of white wine (or use broth or a blend) to the bottom of the roasting pan and roast the bird for another 12 minutes a pound for an unstuffed bird.
The turkey has fully roasted when a meat thermometer (digital is best) placed in the thigh, not touching bone, reads 160° F.
When the roasting is done, tip the turkey so that the interior juices run back into the pan. Remove the turkey to a separate platter, cover with foil, and allow to rest for at least 30 minutes.
Pour the fat and drippings from the pan into a measuring cup. Deglaze the roasting pan with ½ cup white wine (or use broth) and pour that into the same measuring cup. Use the fat and drippings to make gravy. I like to thicken using cornstarch mixed with cold water and adjust seasonings after I achieve the desired consistency.
- Yields: 1 turkey
- Preparation Time: 2-3 days, mostly hands-off chilling/brining and roasting
